Do you need to be using WordPress & Cloudflare?
See if this sounds familiar:
Ever been freaked out by the thought of your site being hacked? Ever had to pay someone (like me) to clean it out after it’s been hacked and vowed to never let it happen again?
I’ve heard the horror stories and seen more than a few.
Security for your website is a really BIG freaking deal – hackers don’t care if your a total newb or a seasoned vet – they’re going to try and hack your site regardless.
So you need to do yourself the favor of getting set up with the right security tools to begin with.
One of the things we do for all our hosting and maintenance & support clients is set them up to use one of my favorite tools called Cloudflare.
Cloudflare provides major security and performance enhancements and it’s a given that this is a tool that you need to be using on your new self-hosted WordPress website. This lesson covers how to get your domain name connected to the service and how to make it work for you.
In the 8th part of my in-depth WordPress training series, I teach you how to use one of the best tools a website owner can have in their toolbox.
Get the full FREE WordPress training course sent straight to your inbox: https://rbrr.co/free-wp-training-yt
Would you rather skip all this and have your WordPress blog built and launched *for* you?
I got you covered – check this out: https://rbrr.co/wordpress-done-for-you
WordPress & Cloudflare – Securing Your New Website
Welcome to The Building your WordPress framework series where we’re going to set your new self hosted WordPress site up with some important additional features and functions. We do this by using plug-ins.
What we’re going to do here first is get our framework in place here by getting our site setup on a service called Cloudflare.
Changing name servers
You’ll remember from the domain name video that I mentioned, we were going to come back and make one more change to our name servers. That’s what we’re going to start with here.
This first one, we’re going to be using Cloudflare. This is not technically a plug-in. It’s actually a service through which we’re going to connect our site.
Cloudflare is a really great resource because it provides your site with some additional security. It also serves as a content delivery network. What that means is it serves as a distributed system around the globe, to provision your content faster for your users in those different geographic areas.
And ultimately can make your site a little bit faster for those users. I’ll show you a little bit about what that is. We’ll set up rules and things like that for Cloudflare later on.
Provisioning your Domain Name
Right now, we’re just going to go ahead and provision our domain name. All you need to do, to do this is to go over to https://www.cloudflare.com and create an account.
I’ve already got an account setup here. We’re going to use this one. It’s really simple and straightforward. All the standard kind of basic information that you would need to set up your account online with any other services, the kinds of things you’re going to do.
Once you’ve gotten to the point where you have completed the initial setup step, you’re going to see a screen that looks like this, which is where you have the ability to add your domain name for your website.
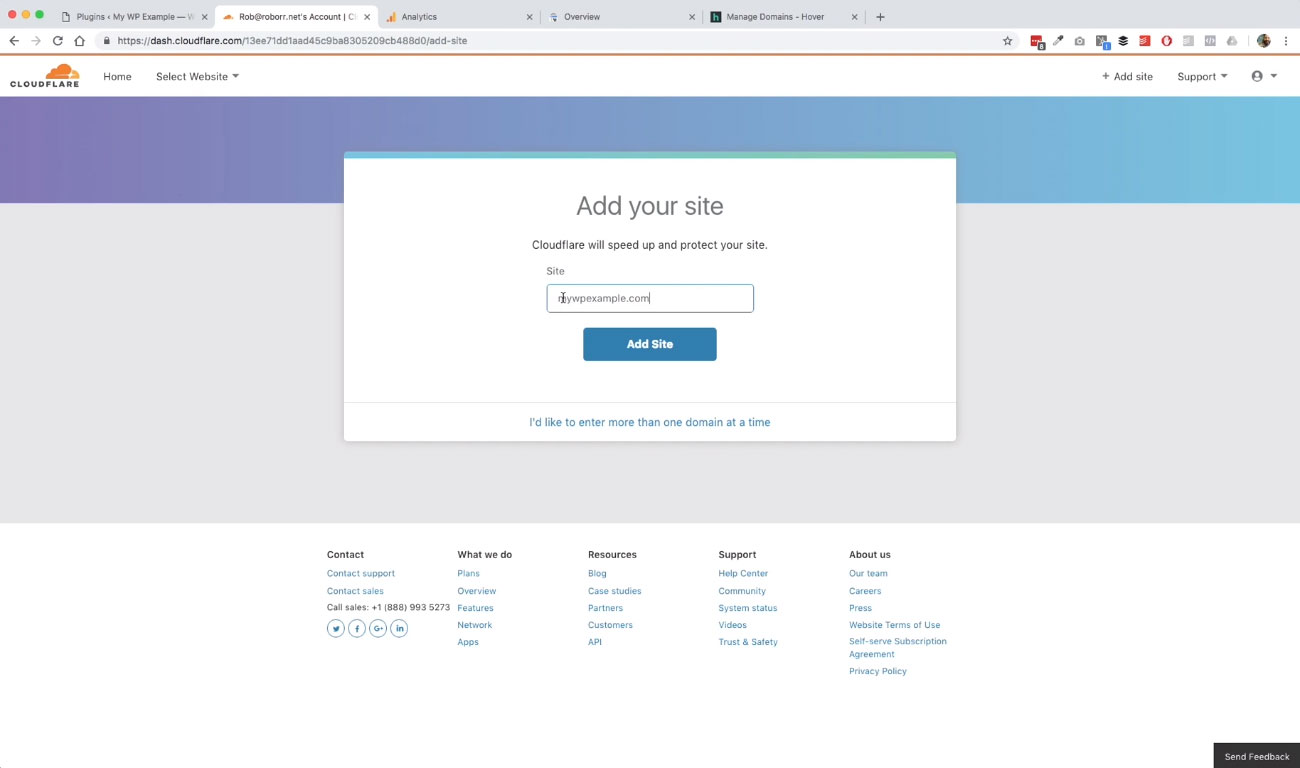 We’re going to go ahead and do that here. I’ve already got my site, added mywpexample.com. We’re going to go ahead for the next step here and click Add site. Then Cloudfare is going to start to do its thing.
It’s going to do a check on what your DNS records are. You don’t really have to do anything here. This is just kind of keeping you up to date on what they’re actually going to do.
They’re going to check your zone file and those kinds of things, and so on. You’re going to select the basic plan here. You can upgrade your plan, when the need becomes really apparent, but for most sites and just about for every single site when you’re getting started, you don’t need a big fancy plan.
You just need this basic free plan that gives you the basic feature set for what you want to do because Cloudflare is going to provide an additional layer of security for your website. It’s going to help to speed your website up just a little bit.
We’re going to use this basic free plan here.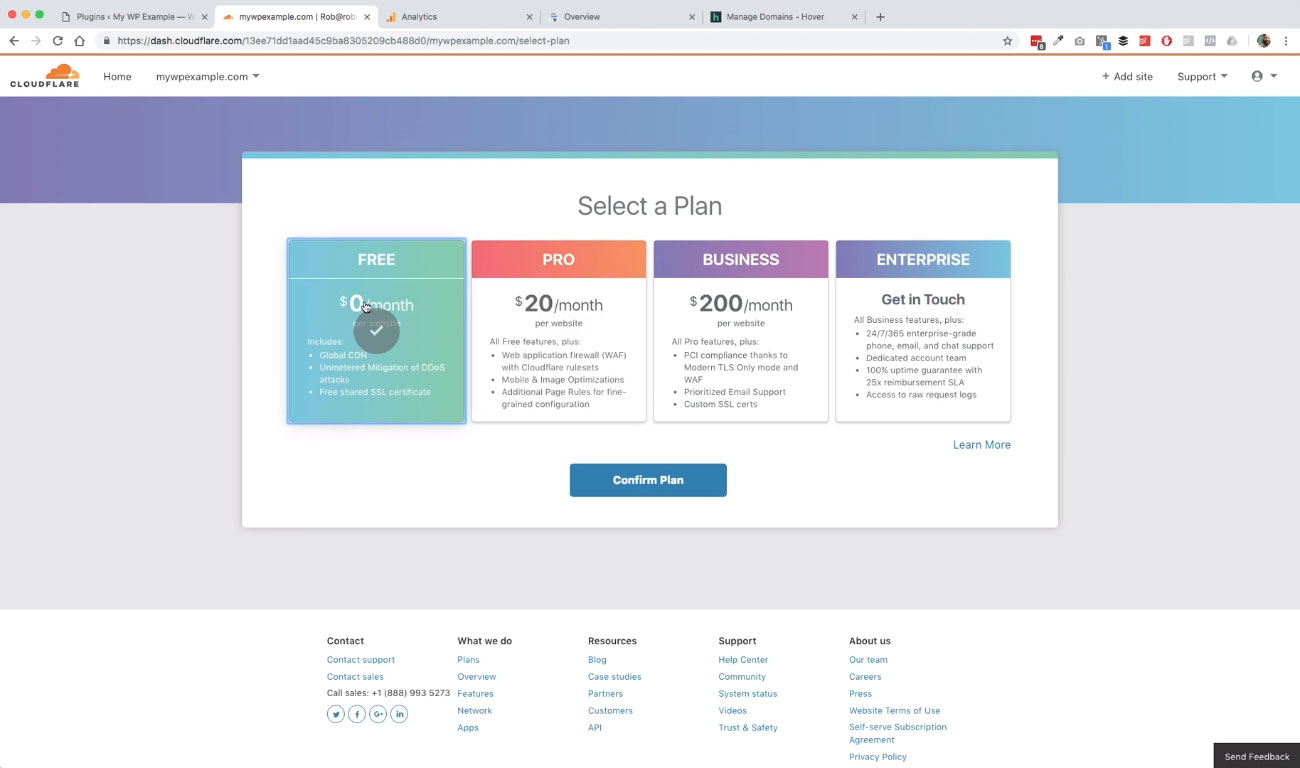 We’re going to confirm this. Click Confirm one more time.
The next step what the Cloudflare has done as it’s gone in queried our DNS records. If this looks like a bunch of technical gobbledygook to you, you don’t really have to do much with this.
Basically, what it does is a scan of the records that were created at your domain name registrar, which in our case it was Hover, if you remember correctly. We’re actually going to go look at that here again in just a second.
When I bought that name from Hover, Hover, by default created a bunch of records in my DNS for my DNS records, in what’s called a “zone file”.
That’s not really all that important, but the zone file is this.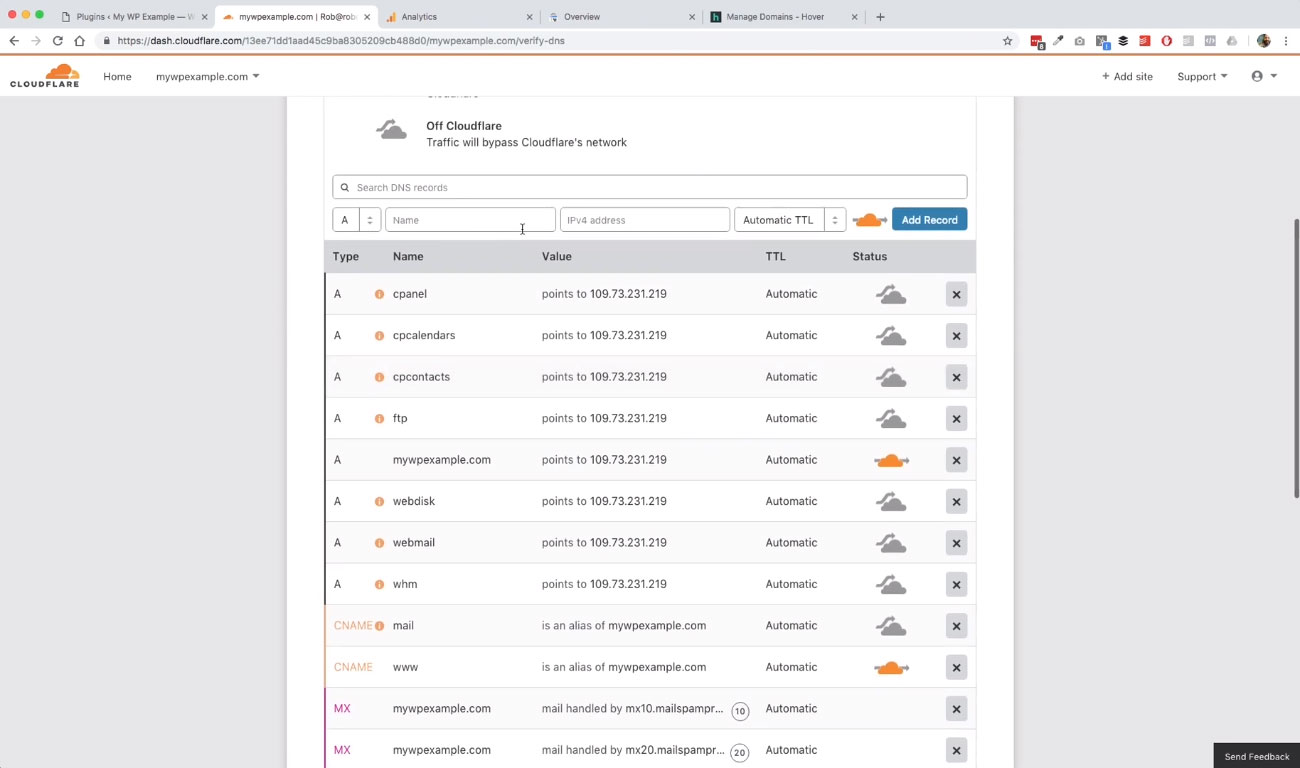 You have all of these different records that point to different things.
For instance, these MX records or Mail Exchange records, these txt records or txtrecords that provides some different services to you in terms of authenticating with mail services, and those kinds of things.
I say all this just to give you a basic idea of what these things are. You really don’t need to do anything here. The only thing that you would need to be concerned about here is if when you put your domain name in, and you’re walking through this setup in Cloudflare that there’s nothing in here that would be something to be alarmed about and you would need to check with your domain name registrar to see what the deal is.
They should be able to point you in the right direction, if that indeed was the problem. As far as we’re concerned, we’re not going to really worry about this. This Cloudflare setup piece is really just a matter of using the default settings, as we walk through this to get your name into the Cloudflare service and let Cloudflare do its thing here.
We’re going to go ahead and verify this and say everything that we’ve got here is correct, because it’s going to ask you up here. It’s saying, “Hey, we want to make sure that we’ve got everything you’ve got on your side. From our scan, this is what we found, if there’s something missing, you can add it below.”
I have not run across except maybe one or two instances where in that was a very complex situation where it does not grab all your domain name records. For our purposes, this is not going to be a big deal. It’s going to do a good job of grabbing all of your information associated with your domain. We’re going to go ahead and leave that here.
Updating Name Servers
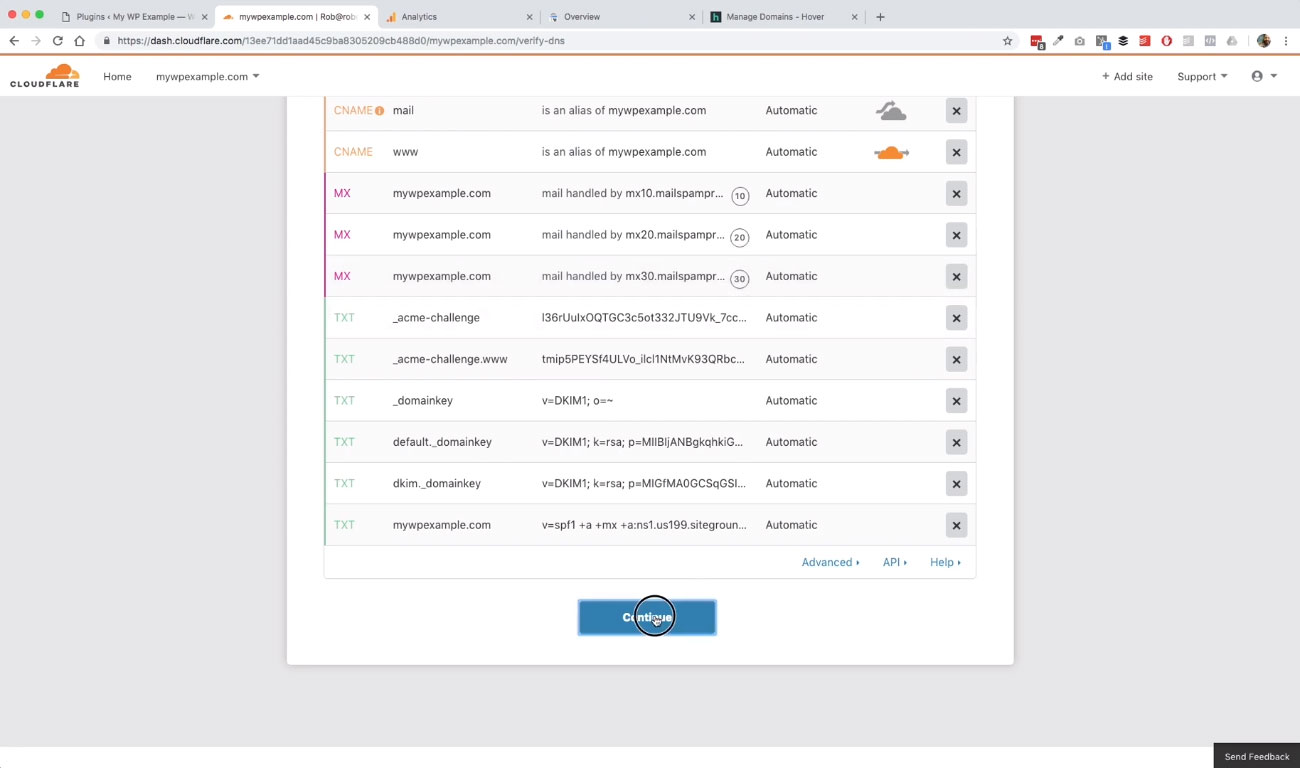 The next step for us here is to hit Continue. Now it’s going to ask us to update our name servers. Let’s go back to what we were talking about before with our domain name registrar.
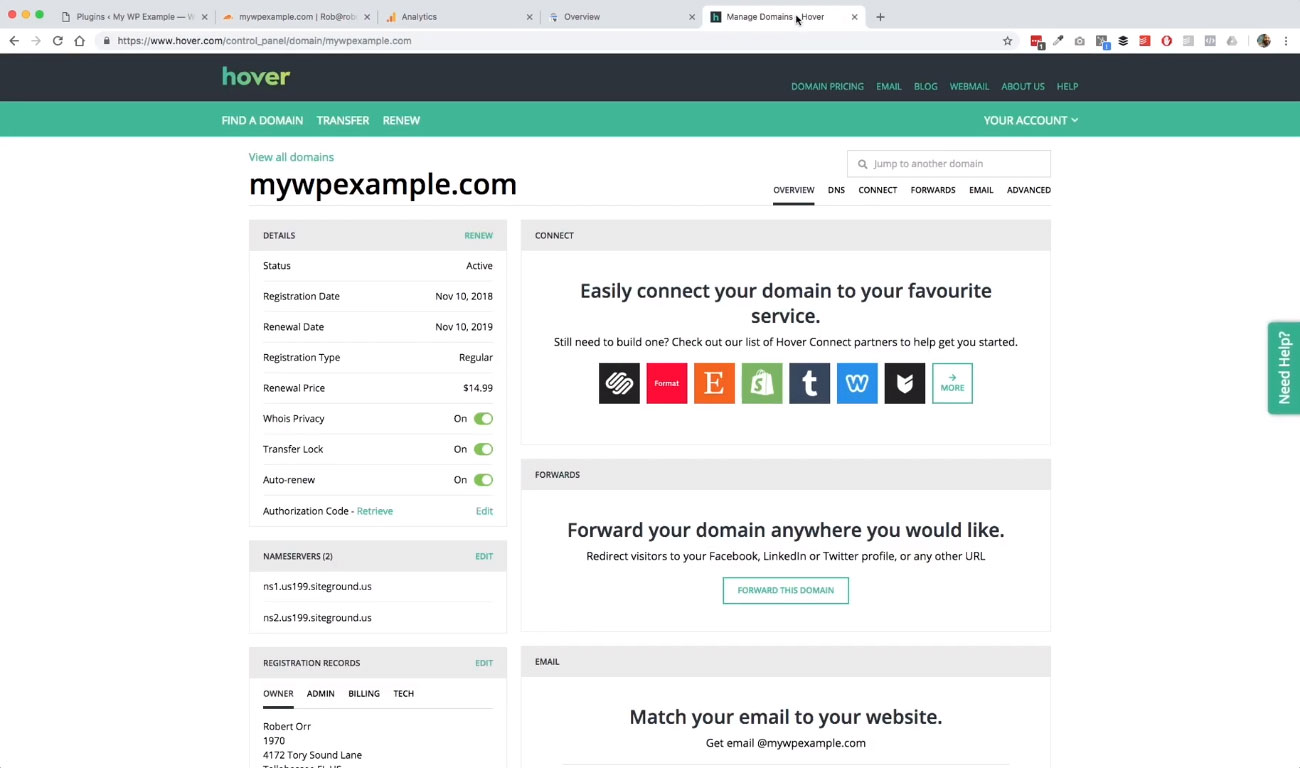 We go back over here to Hover. I have already logged in over here.
Remember, I told you that there’s only really one thing that we need to pay attention to here, and that’s this name servers piece. Because we are going to come back and make one more change, because if you remember, when we first started, our name servers were set to the SiteGround server, because that’s our hosting service.
Our name servers were set to the Hover default name servers. We had to switch them to the SiteGround name servers, which I did. It was a really simple process.
What we need to do now that we are filtering our domain name through Cloudflare, is to go ahead and update it to what it’s asking for here.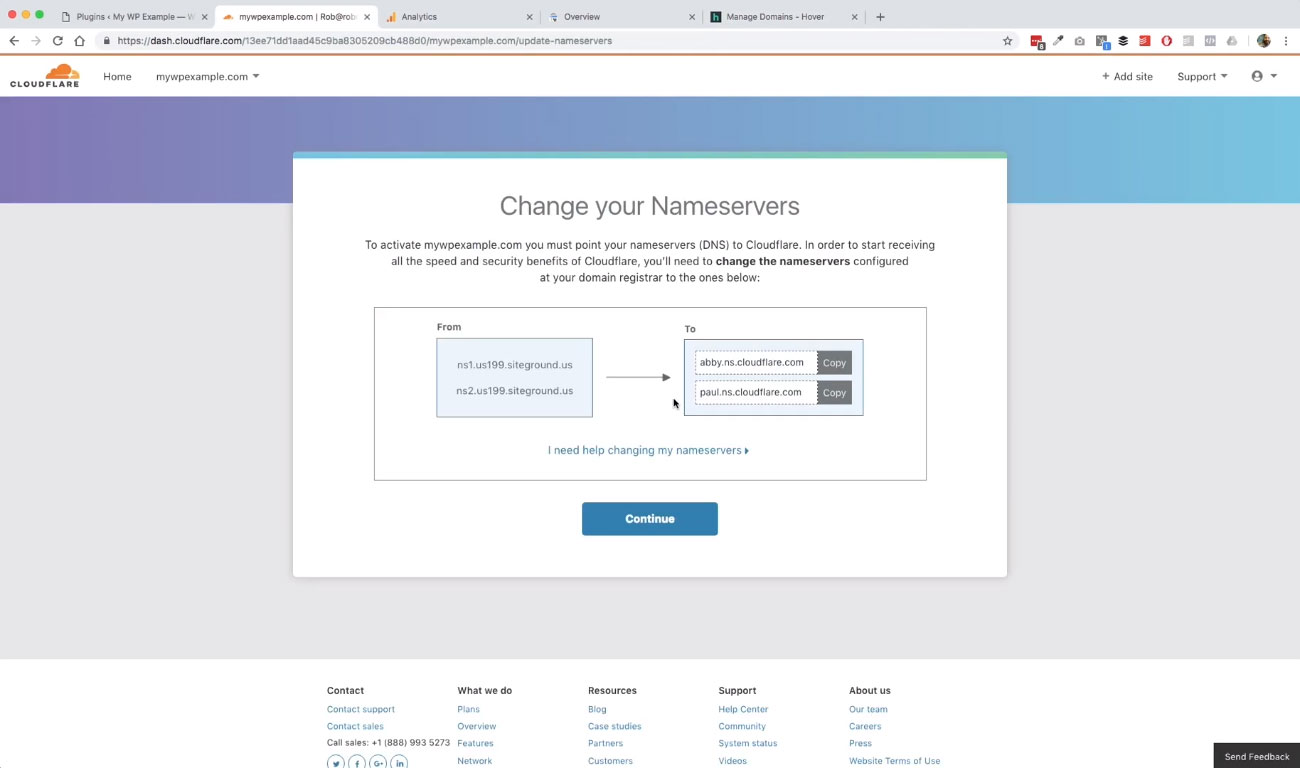
We’re going to go ahead and grab this information from Cloudflare. Go back over to Hover, click Edit. Then we’re just going to paste this information in.
It copies us for us. Here we go. Then that’s really all there is to. Just make sure that there are no spaces at the beginning, which there usually aren’t, and then click save name servers. Then it will take a minute or two to provision, but that’s really all we need to do.
Hover has now updated my name servers. We can go back over to Cloudflare now. As you can see, this has been changed. It was pointing to SiteGround. Now it’s pointing to Cloudflare.
What we’re going to do now is go ahead and hit continue, which basically is telling Cloudflare that we’ve gone ahead and made that update. Then it’s going to start the review process, which is basically they’re just waiting for your domain name to provision on their side so that the name servers have been updated.
As far as Cloudflare is concerned, this is really all that we want to do at this point. We’ve got everything that we need. We’ve changed our name servers. We pointed it to Cloudflare.
Cloudflare has all of our information correctly. All we’re going to wait for now is for that to provision. That doesn’t have to slow us down. We can go ahead and proceed when we’re ready.
And as you can see here, the domain name servers have been updated already. You can see that the status is active on Cloudflare.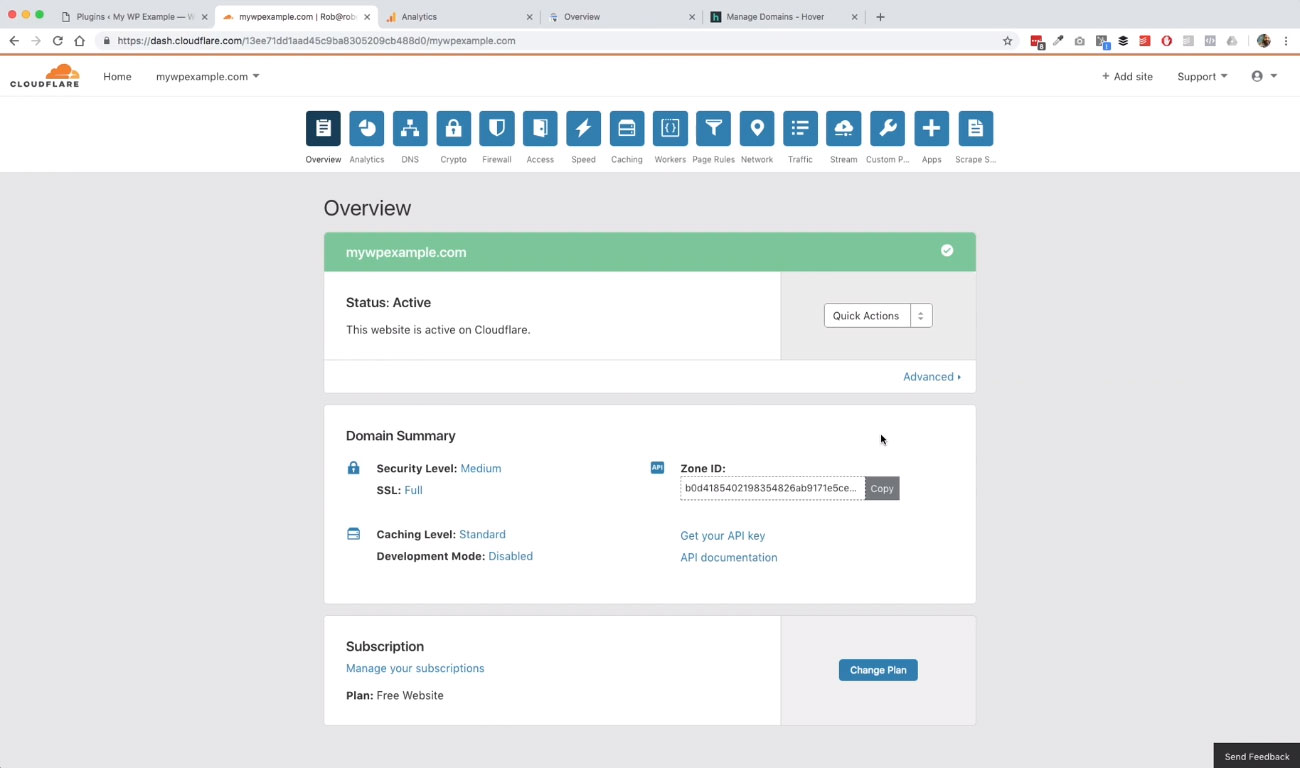
We are completely done with this process. Like to do this at the beginning, before we start getting into doing a lot of plug-ins and things like that, because I like to have our DNS set up in the way that it’s going to be permanently going forward.
That way, if for whatever reason we need to do anything with our domain name zone file, we know where to do it. We’re going to go ahead and do that through Cloudflare. That was a really short and sweet piece. Next up, we’re going to get into talking about some more of the plug-ins that we are going to be installing.